How to Photograph a Room Before AI Staging
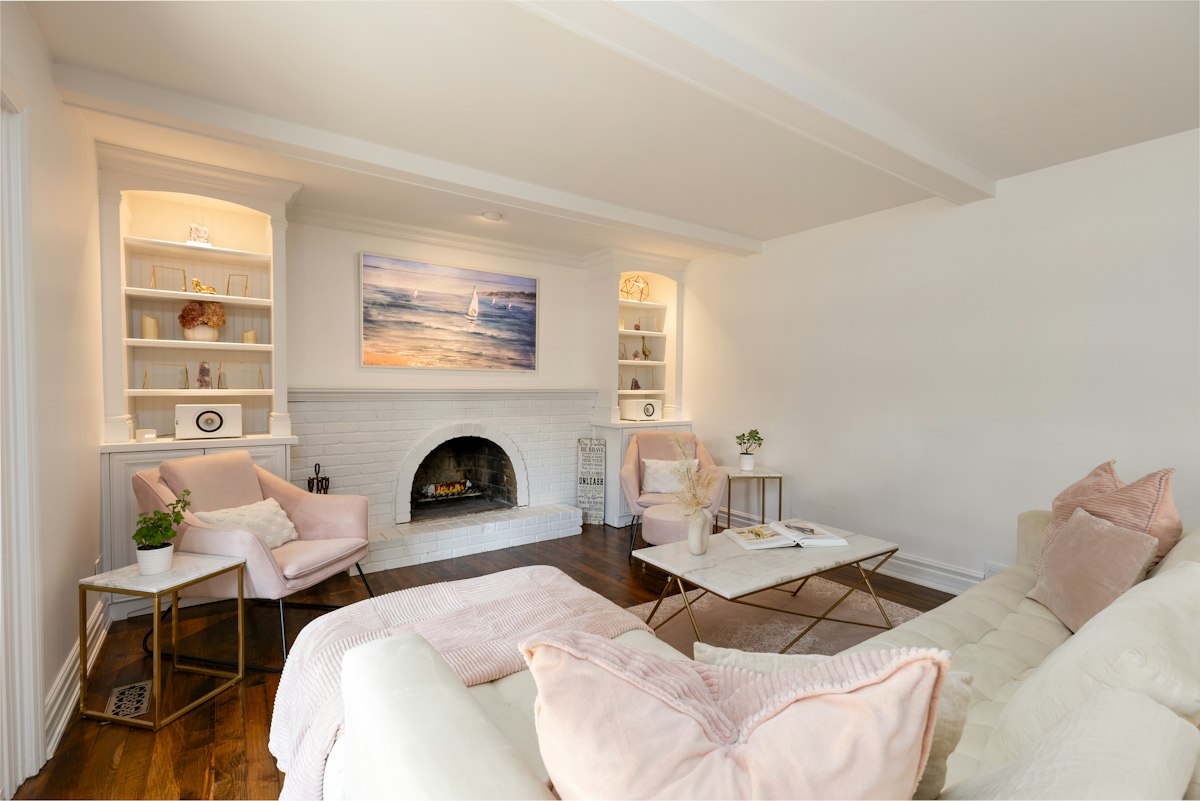
Knowing how to photograph a room before AI staging is the single biggest factor in whether your finished listing images look believable or artificial. AI staging tools can only work with what the camera gives them, so a clean, level, well-lit source photo produces realistic furniture, correct scale, and natural shadows. This guide covers room prep, the best angle to photograph a room, camera setup, lighting, and a room-by-room checklist you can reuse on every listing.
Quick answer: Declutter and depersonalize the room, open the blinds and switch on fixed fixtures, then shoot from a corner or doorway with a level camera held at chest height, framing two walls and the floor in landscape orientation. Take two to four angles per room, and avoid flash, fisheye lenses, and tilted verticals.
Why photo quality matters before AI staging
AI staging models read a photograph the way a designer reads a floor plan. They look for the floor plane, wall corners, window placement, ceiling line, and perspective convergence to decide where a sofa, rug, or bed can physically sit. When those cues are clear, the tool can place furniture that respects the room's real proportions.
When the source image is weak, the output suffers in predictable ways. Clutter gets misread as built-in structure. Tilted verticals make the AI compensate with furniture that leans. A blown-out window turns into a glowing rectangle with no frame. Mixed color temperatures push the model toward odd wall tones. In practice, most "bad AI staging" complaints trace back to a bad source photo rather than a bad model.
There is also a commercial argument. Clean source photos mean fewer regeneration attempts, faster turnaround on a listing deadline, and images that hold up when a buyer walks through the door. If the staged photo promises a room the buyer cannot recognize, you lose trust in the whole listing. The fastest way to see the difference is to try AI staging on one clean test photo before you reshoot an entire property.
Prepare the room before you shoot
Prep work takes fifteen minutes and saves an hour of retouching. Treat this as real estate listing photo preparation, not a light tidy-up.
Declutter and depersonalize
You do not need an empty room, but you do need a neutral one. Remove or hide:
- Family photos, diplomas, religious items, and personal collections
- Excess decor: knickknacks, layered throws, too many pillows, fake plants
- Pet bowls, beds, crates, toys, and litter boxes
- Countertop clutter in kitchens and vanities: bottles, kettles, sponges, mail
- Cords, chargers, cables, and visible power strips
- Bins, hampers, and trash cans — or at least close and tuck them away
The goal of decluttering before staging photos is not minimalism for its own sake. It is removing objects the AI might mistake for architecture or accidentally keep in the staged result.
Clean the surfaces that show
Clean mirrors, windows, glass tables, and any glossy surface that will catch reflections. Wipe floors and vacuum edges where dust collects. In bathrooms, close toilet lids, clear the counter, and fold or remove towels that look rumpled. Streaks on a mirror become smears in a staged image, and dust on a dark floor reads as noise.
Open blinds, turn on lights, and neutralize the space
Open every blind and curtain to let daylight in. Turn on all fixed fixtures — ceiling lights, under-cabinet lighting, lamps that stay with the house. Straighten furniture so it sits square to the walls, and push bulky pieces slightly away from the camera path so you can shoot past them.
If a wall is a strong accent color, note it before you shoot: the AI will stage around that color, so a saturated red or green wall pulls the whole palette. Our guide to wall color explains how to judge whether a tone should stay or be neutralized first.
Choose the best angle for each room
The best angle to photograph a room is almost always from a corner or a doorway, positioned so you can see two walls and the floor plane at once. That three-surface view gives the AI enough geometry to place furniture in a believable arrangement.
- Shoot from the corner opposite the focal point. If the room has a fireplace or a large window, stand across from it so it appears in frame with a wall on either side.
- Capture at least two walls. One wall gives no depth; two walls plus floor gives a room.
- Include the floor. Crop too high and the AI has nowhere to place a rug, sofa, or bed.
- Avoid close-ups of a single feature. A tight shot of a faucet or a bed corner is fine as a detail image, but it is not a staging source photo.
- Step back rather than zoom in. Moving backward preserves perspective; zooming compresses it and flattens the room.
Doorway shots work well for hallways, small bedrooms, and bathrooms where a corner position is impossible. Just make sure the door frame does not block a third of the image.
Use the right camera setup
Whether you shoot on a phone or a mirrorless body, the fundamentals are identical.
- Shoot horizontally. Listing photos live in landscape orientation, and a vertical frame cuts off the walls the AI needs.
- Use a wide-angle lens — with restraint. A 16–24mm full-frame equivalent (roughly the 1x main lens on a phone) is the sweet spot for wide-angle real estate photos. Skip the 0.5x ultra-wide unless the room is genuinely tiny, and never use a fisheye.
- Keep the camera level. Hold it at chest height, about four to five feet, and keep it perfectly horizontal. Turn on grid lines or a virtual horizon so vertical lines stay vertical.
- Use a tripod when you can. It guarantees level framing, lets you bracket exposures, and eliminates motion blur in dim rooms.
- Do not tilt the camera up or down to "get more in." Tilting creates converging verticals that make furniture look like it is sliding off the floor.
If you are shooting a whole property, the same setup applies to every room, which is why a room photography checklist for staging is worth keeping on your phone.
Control lighting and color
Lighting is where most virtual staging photo tips are won or lost. The AI needs to understand where the light comes from so it can render shadows consistently.
Favor natural daylight
Shoot during the brightest part of the day with the blinds open. Overcast light is ideal because it is soft and even. Direct midday sun creates harsh patches and blown highlights on floors, so if the sun is streaming in, wait an hour or shoot a different room first.
Turn on fixed fixtures
Switch on ceiling lights, lamps, and under-cabinet strips. Blending artificial light with daylight evens out exposure and prevents dark corners that read as holes in the wall. It also tells the AI where the room's real light sources are.
Avoid mixed color temperatures
Warm bulbs plus cool daylight plus a camera's auto white balance produces a photo with three different whites. That confuses both editing software and staging models, often resulting in yellow or blue color casts across the staged furniture. If you cannot match bulbs, turn off the mismatched ones and rely on daylight. Shoot in RAW if your camera allows it, and set white balance so white walls look white.
Skip the on-camera flash. It flattens depth, creates hard shadows behind furniture, and reflects off windows and glossy surfaces. If a room is genuinely dark, bracket three exposures and merge them, or bring in a portable LED panel bounced off a wall.
Capture a complete room set
One photo per room is rarely enough. Take two to four images of main spaces such as living rooms, kitchens, and primary bedrooms, and at least two angles for secondary bedrooms, bathrooms, and home offices.
- Primary angle: the wide corner shot that shows the room's full shape.
- Secondary angle: a shot from the opposite corner or the doorway, revealing what the first angle hid.
- Flow shot: a frame that includes the connection to an adjacent space — a hallway, open kitchen, or patio door.
That last one matters more than people expect. When the AI can see how rooms connect, staged furniture placement feels natural instead of floating in a sealed box. Once your set is complete, you can move straight into a staging workflow through our services.
Common mistakes to avoid before virtual staging
Run this list before you upload anything:
- Fisheye distortion or bowed walls
- Tilted vertical lines from shooting upward
- Heavy shadows under cabinets and behind furniture
- Blown highlights on windows, floors, or stainless appliances
- Motion blur from handheld shots in low light
- Messy floors with shoes, bags, or toys
- Visible cords, extension leads, and routers
- Toilet lids up, open bins, unfolded laundry
- Your own reflection in mirrors, TVs, or windows
- People, pets, or watermarks in the frame
- Duplicate or near-identical shots that waste staging credits
Any of these can force a regeneration or, worse, slip into the final image. Two minutes of review saves a full round of revisions. For more interior photography and staging guides, browse the blog.
Room-by-room AI staging photo checklist
Living room
- Wide corner shot showing two walls and the full floor plane
- One secondary angle from the opposite corner or entryway
- Full visibility of the main wall where a sofa or media unit would sit
- Window and fireplace captured in frame if present
Bedroom
- Straight-on shot of the bed wall, level and centered
- Opposite corner angle showing the remaining walls
- Closet door or window angle to establish room size
- Nightstand and floor space visible on both sides of the bed
Kitchen
- Main work zone: run of cabinets, counter, and backsplash in one frame
- Sink or island view from the opposite side of the room
- Appliance alignment — fridge, range, and dishwasher squared to the camera
- Clear countertops and no dish towels or small appliances in shot
Bathroom
- Vanity framed square to the camera with a clean mirror
- Shower or tub angle showing the full enclosure
- Countertop clear, toilet lid down, towels removed or neatly folded
- No reflections of the photographer in glass or mirrors
FAQ
What is the best way to photograph a room before AI staging?
Clean and declutter the room, open the blinds, use natural light with fixtures turned on, and shoot from a corner or doorway with a level camera to show two walls and the floor.
Should I use a wide-angle lens for virtual staging photos?
Yes, a wide-angle lens is useful, but avoid extreme distortion. Aim for roughly 16–24mm full-frame equivalent. The goal is to show the room accurately, not make it look unnaturally large.
How many photos should I take of each room?
Take at least two angles per room, and three to four for key spaces like living rooms and kitchens so the AI staging result has enough context to place furniture correctly.
Do rooms need to be empty before AI staging?
No. Rooms do not need to be fully empty. They should be clean, organized, and free of clutter, personal items, and visual distractions that could confuse the staging model.
What lighting is best for photographing a room for AI staging?
Natural daylight works best, with all permanent light fixtures turned on to create even brightness and reduce harsh shadows or color imbalance. Avoid flash and mixed color temperatures.
Can I use phone photos for AI staging?
Yes. A modern phone's main wide lens is more than sufficient if you keep it level, shoot horizontally, use a tripod or stable surface, and follow the same prep and lighting rules as a professional camera.
Shoot once, stage better
Good source photos are the cheapest upgrade in real estate marketing. Fifteen minutes of decluttering, a level camera, and one well-chosen corner angle will do more for your staged images than any amount of post-processing.
When your photos are ready, try AI staging on a single room to see how a clean, well-shot interior becomes a fully furnished listing image in minutes. For full-property turnaround, explore our services, and if you want layout inspiration before you pick up the camera, start with our design ideas library.
Ready to design your space?
Try AI-powered room design and transform your photo into a beautifully staged room in seconds.
Try It Now